Getting Started
WordQ PDF allows you to open PDF documents (local, Google Drive™) for accessible* reading and writing. In addition to general reading of a PDF document, it is perfect for completing assignments and tests that are provided as PDFs. You can fill in form fields or add your own text boxes; add sticky notes; and mark up text with annotations. All of these can be edited at any time.
All WordQ functions are available to work with a PDF document including:
*Documents that have been scanned must be converted first by OCR
Note: When used within Chrome on MacOS, the command key ⌘ is used instead of the CTRL key.
![]() Navigation Panel
Navigation Panel
- View all pages as thumbnails
- View an outline or table of contents of the document, if it is included;
- View a list of signature fields
![]() Annotations Panel
Annotations Panel
- View all annotations, highlights, marked text, and added drawing objects
![]() Print... prints the PDF document
Print... prints the PDF document
![]() P Pan
P Pan
- Scroll through a PDF document
- Position the cursor over any annotation for that annotation to be read
- Fill in text form fields with full WordQ support (e.g., word prediction, speech feedback)
- Select check boxes and choice buttons in a form
![]() ESC Selection
ESC Selection
- Select non-editable text to read
- Fill in text form fields with full WordQ support (e.g., word prediction, speech feedback)
- Select check boxes and choice buttons in a form
- Copy and mark up non-editable text (highlight, underline, strikeout)
- Edit an existing annotation
- Modify, style, move, and add an annotation to a drawn object (line, circle, rectangle, etc.)
![]() Fit Page fits the page within the height of the window
Fit Page fits the page within the height of the window
![]() Fit Width fits the page across the width of the window
Fit Width fits the page across the width of the window
![]() CTRL (⌘) → Rotate Clockwise rotates the page clockwise
CTRL (⌘) → Rotate Clockwise rotates the page clockwise
![]() CTRL (⌘) ← Rotate Counterclockwise rotates the page counterclockwise
CTRL (⌘) ← Rotate Counterclockwise rotates the page counterclockwise
![]() CTRL (⌘) + Zoom In increases the page size
CTRL (⌘) + Zoom In increases the page size
![]() CTRL (⌘) - Zoom Out decreases the page size
CTRL (⌘) - Zoom Out decreases the page size
![]() CTRL (⌘) F Search opens a search box to find words or phrases within the document
CTRL (⌘) F Search opens a search box to find words or phrases within the document
Under the File menu select Open from Google Drive...
A dialog display your Google Drive documents that can be opened in WordQ for Chrome. Choose a document.
Under the File menu select Save to Google Drive or Save to Google Drive As...
Name your document. Click OK when done.
Your document will be saved to your Google Drive.
WordQ automatically saves your document as you write. If your computer goes offline, your document will be automatically saved locally.
Under the File menu select Open...
A standard dialog, that varies with operating system (Chrome, Windows, or Mac OS), will be shown for you to choose and open a PDF document locally or in the cloud.
Under the File menu select Save or Save As...
A standard dialog, that varies with operating system (Chrome, Windows, or Mac OS), will be shown. Name your document and save to your preferred document location locally or in the cloud.
- Click the Selection
 button, if not already selected.
 - Using your mouse or touchpad (or other pointing device), drag over the text to be read, then click the Read button
 .
.
- Use the SPACEBAR to pause/play reading with word-by-word highlighting.
- After pausing, you may:
- Read individual words by pressing → or ← arrow keys to move within a sentence
- Continue reading by pressing SPACEBAR
- Go to the previous or next sentence by pressing ↑ or ↓ arrow keys
Annotations
- Click on the Annotate
 button.
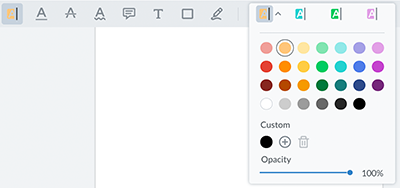
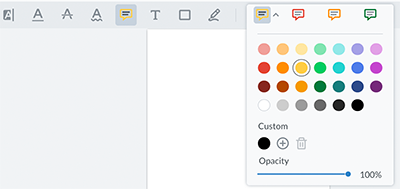
 - Click on the Highlight
 button (or press H), and then select a highlight color.
- Drag over the desired text to highlight it.
- Modify the highlight by choosing the Selection button
 , and click on the highlighted text.

You can then change the size of the highlighted text, add a comment, change its color, delete it, and even add a URL link. - Click on a Underline (U), Strikeout (K), or Squiggly (G) button for other types of highlighting.
- Later, when you hover over the highlighted text, it will be spoken.

- Click on the Annotate
 button.
 - Click on the Sticky Note button
 and select a Sticky Note color
- Click in the document at the desired location to place the sticky note.
- CTRL (⌘) X Cut
- CTRL (⌘) C Copy
- CTRL (⌘) V Paste
- CTRL (⌘) Z Undo
- Modify the sticky note by choosing the Selection button
 and click on the sticky note.
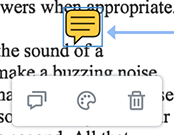
You can then move the sticky note, edit your comment, change its color, or delete it.
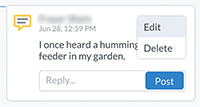
- Later, when you hover over a sticky note, it will be spoken.

In the right-hand side panel add your comment for this sticky note, and then click Save when done.
Word prediction, speech feedback, and the following standard shortcut keys are available:
- Click on the Annotate
 button.
 - Click on the Text button
 and select a text color, fill and border colors, and text size.
- Position the cursor in the document at the desired location, and drag across to create a text box.
- CTRL (⌘) X Cut
- CTRL (⌘) C Copy
- CTRL (⌘) V Paste
- CTRL (⌘) Z Undo
- Modify the text by choosing the Selection
 button, and then click on the text box.
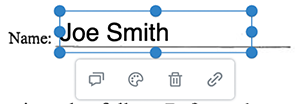
You can then change the size of the text box, move it, add a comment, change its color, delete it, and even add a URL link. - Edit the text by double-clicking within the text and make your changes.

- Later, when you hover over a text box, it will be spoken.
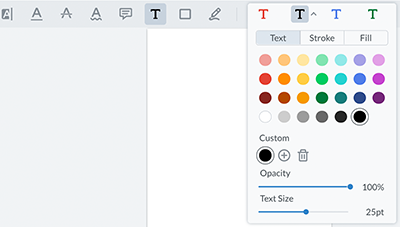

Type over "Insert text here" with your own text.

Word prediction, speech feedback, and the following standard shortcut keys are available:
- Click the Selection
 button, then on a Sticky Note or Text Box and press Backspace/Delete.
 - Or, click the Erase
 button, and drag over any annotation, including highlighted text.
Note: You can only erase an annotation that you (current Chrome user) have created.
Drawings
- Click on the Shapes
 button.
 - Click one of the drawing tools: FreeHand (F), Rectangle (R), Oval (O), Polygon, Cloud, Line (L), Polyline, or Arrow (A) button, and then choose a color and stroke size.
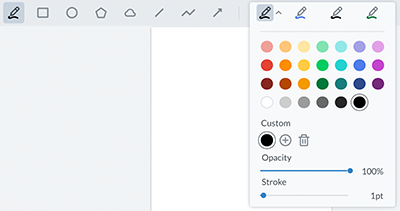
- Drag and click across the document to draw on it. Some drawing tools require you to double-click to complete a shape.
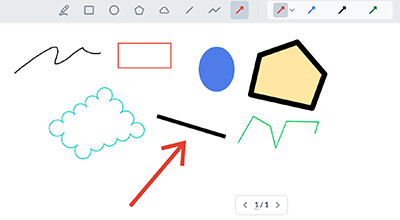
- Modify a shape by choosing the Selection
 button, and then click on a drawn shape.
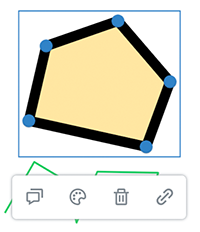
You can then change the size of the shape, move it, add a comment, change its color, delete it, and even add a URL link.
- Click the Selection
 button, then on a drawn shape and press Backspace/Delete.
 - Or, click the Erase
 button, and drag over any shape.
Attachments
- Click on the Insert
 button.
 - Click on of the Signature (S) button followed by clicking on Add New Signature button, or choose a signature from the dropdown if already created.
- Draw, type, or upload your signature from a file, and click on Create when done.
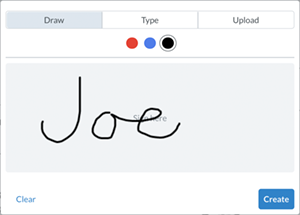
- Click within the document where you want to place your signature.

You can then change the size of the signature, move it, add a comment, change its color, delete it, and even add a URL link. - To erase a signature later, click the Selection
 button, then on a signature and press Backspace/Delete, or click the Erase
  button, and drag over a signature.
- Click on the Insert
 button.
 - Click the Rubber Stamp
 button, then choose an available stamp.
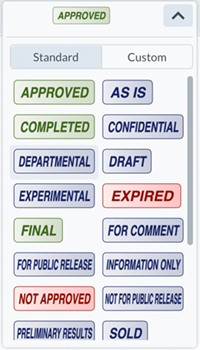
- Click within the document where you want to place the stamp.

You can then change the size of the rubber stamp, move it, add a comment, change its opacity, delete it, and even add a URL link. - To erase a rubber stamp, click the Selection
 button, then on a stamp and press Backspace/Delete, or click the Erase
  button, and drag over a stamp.
- Click on the Insert
 button.
 - Click the Stamp
 button, then click within the document where you want to place the image.
- Choose an image from the File Open dialog.
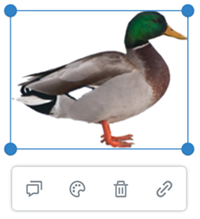
You can then change the size of the stamped image, move it, add a comment, change its opacity, delete it, and even add a URL link. - To erase a stamped image, click the Selection
 button, then on a stamped image and press Backspace/Delete, or click the Erase
  button, and drag over a stamped image.
- Click on the Insert
 button.
 - Click the File Attachment
 button, then click within the document where you want to place the attachment.
- Choose a file (document or any media such as an image, movie or sound) from the File Open dialog.
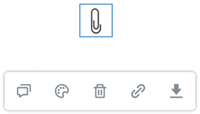
You can then move the file attachment, add a comment, change its opacity, delete it, and even add a URL link.
You can also download the file attachment once it has been placed. - To erase a file attachment, click the Selection
 button, then on a file attachment icon and press Backspace/Delete, or click the Erase
  button, and drag over a file attachment icon.
Note: A callout is very similar to a sticky note, except that you see the comment directly on the document.
- Click on the Insert
 button.
- Click on the Callout button
 and select a text color, fill and border colors, and text size.
- Position the cursor in the document at the desired location, and drag across to create a callout text box pointing to that location.
- CTRL (⌘) X Cut
- CTRL (⌘) C Copy
- CTRL (⌘) V Paste
- CTRL (⌘) Z Undo
- Modify the callout by choosing the Selection
 button, and then click on the callout.
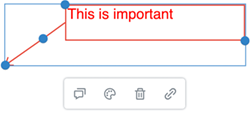
You can then change the size of the callout, move it, add a comment, change its color, delete it, and even add a URL link. - To erase a callout, click the Selection
 button, then on a callout and press Backspace/Delete, or click the Erase
  button, and drag over a callout.
 - Later, when you hover over a callout, it will be spoken.
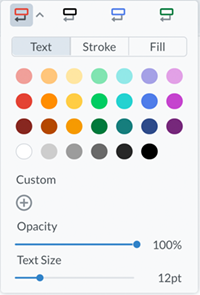

Type over "Insert text here" with your own text.
Word prediction, speech feedback, and the following standard shortcut keys are available:
Navigation
- Click on one of the following toolbar buttons or in the View menu to change how a page is displayed:
![]() Fit Page fits the page within the height of the window
Fit Page fits the page within the height of the window
![]() Fit Width fits the page across the width of the window
Fit Width fits the page across the width of the window
![]() CTRL (⌘) → Rotate Clockwise rotates the page clockwise
CTRL (⌘) → Rotate Clockwise rotates the page clockwise
![]() CTRL (⌘) ← Rotate Counterclockwise rotates the page counterclockwise
CTRL (⌘) ← Rotate Counterclockwise rotates the page counterclockwise
![]() CTRL (⌘) + Zoom In increases the page size
CTRL (⌘) + Zoom In increases the page size
![]() CTRL (⌘) - Zoom Out decreases the page size
CTRL (⌘) - Zoom Out decreases the page size
- Select from the Navigation menu or use the shortcut keys to jump to:
- Next Page CTRL (⌘) ↓
- Previous Page CTRL (⌘) ↑
- First Page ⇧ ←
- Last Page ⇧ →
- Click the Navigation Panel
 button to display it on the left-hand side.
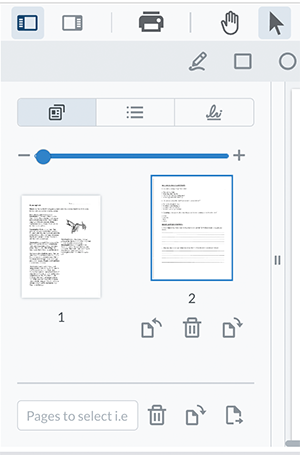
- Click the Thumbnail
 tab to display all pages as thumbnails. Click on a Thumbnail to jump to that page.
- Click the Contents
 tab to display the document's outline or Table of Contents if it is included in the document. Not all documents have an outline or Table of Contents.
- Click the Signatures
 tab to display all signature fields in the document.
- Click the Navigation Panel
 button again to close the panel.
- Click the Annotations Panel
 button to display it on the right-hand side.
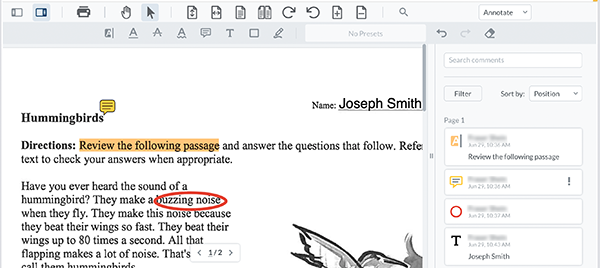
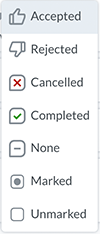
All of your annotations will be listed here. - Click on an annotation and the Review
 button for review.
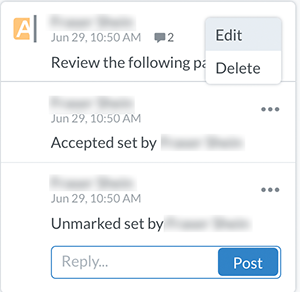
- You may edit or delete an annotation.
- Click the Annotations Panel
 button again to close the panel.
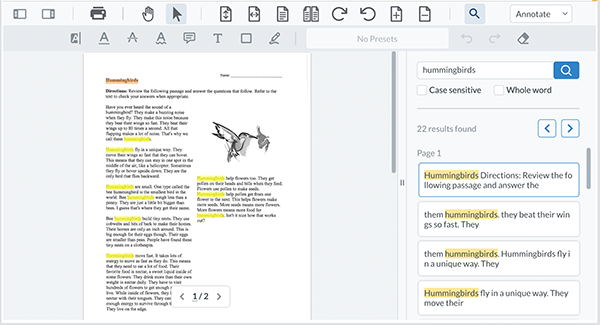
- Click the Search
 button or CTRL (⌘)+ F to display the search box.
- Type in a word to search and view the results in a list.
- Click on a specific result in the list to jump to it within the document.
- Click the Annotations Panel
 button twice to close the Search panel.
